Tutorial: Getting started with localization and translation in Drupal 7, by example
I'm beginning to build a Drupal-powered web site for a customer. A goal for this project is to provide translation of pages, events, and announcements for Spanish-speaking site visitors. Although Google's Translation service is great, automated translation tools remain less than perfect. Fortunately, the customer has several dedicated bilingual volunteers who will translate as much of the site's content as possible.
In this post, I'll walk you through the steps to configure a Drupal 7 site so that it may be translated to other languages.
It's Not Just Translation
 If you're new to building multilingual web sites, I recommend reading the Wikipedia entries on internationalization and localization. Building a multilingual web site involves much more than translating content from one language to another. Translation must be done with an awareness of a language's idioms as spoken within a geographic region. If you're a native English speaker in the United States you probably know that "a lift" means something quite different to the English. Idiomatic differences also exist in Spanish spoken in Mexico, Latin America, South America, and, of course, Spain. Localizing translations is one of the biggest challenges for machine translation and the primary reason we chose to manually translate our content rather than slapping the Google Translation Widget on our pages.
Localization, Translation, and Drupal
Localizing and translating a web site is a complicated task, but Drupal does a remarkably good job of simplifying the process. If you're interested in the technical details and decisions that went into how Drupal supports internationalization, have a look at Gabor Hojtsy's series, "Drupal 7's new multilingual systems compilation."
Karen Stevenson wrote a wonderful article, "Localized and Multi-Lingual Content in Drupal 7", which summarizes Gabor's series. In her article, Karen discusses the two site components requiring translation, the interface and the site's content. Text in Drupal's interface, including the login form and navigation menu, has already been translated into many of the world's languages which saves you, I, and the rest of the Drupal community a ton of time.
Karen also breaks down the two content translation options available in Drupal 7, full-node translation and entity translation, which is new in Drupal 7. After some consideration, I decided that entity translation was the best choice for the site I'm building. So, with this introductory information in mind, here are the steps I used to configure multilingual support in a Drupal 7 site.
1.0 Define Languages and Translate the Interface
The foundation for multilingual support in Drupal 7 is the Locale module which ships with the default distribution. Enable locale, then define the languages your site will support. In this article, I'll be using Drush to install and enable modules. If you're new to Drush, have a look at my introductory article, or download and enable modules through Drupal's administration interface.
1.1 Enable the Locale Module, Add Languages, Configure Language Switching
drush @my-site pm-enable locale
With locale enabled, you can now add the languages your site will support.
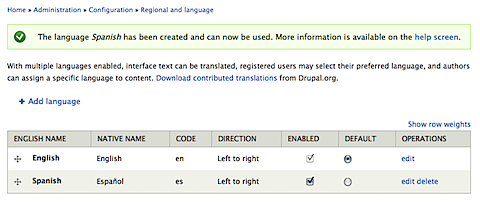
- Go to Administration > Configuration > Languages (under "Regional and Language")
- Click "Add language"
- Select a predefined language, in my case, Spanish (Español)
- Click "Add Language"
Add as many languages as you need. You can also add custom language translations here.
After adding languages, you'll need to configure how users' language preference are detected and how they'll switch between languages.
- Select the "Detection and Selection" tab (Administration > Configuration > Languages)
- Check one or more methods to detect the language to display (I enabled all, although I won't use all initially)
- Save the settings
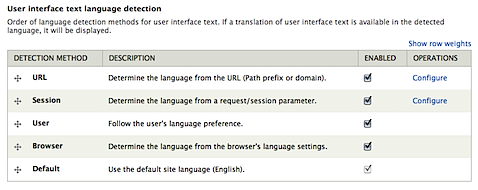
You can rearrange the priority of detection methods, set which part of the URL to use in detection (es.mysite.com vs. mysite.com/es/), and set a request/session variable name to use to switch languages.
1.2 Load an Interface Language Translation
If you're localizing for one of the predefined languages listed on the Add Language form, most, if not all, interface translation work has already been done for you. Most of the core Drupal interface, including default menus and blocks, has already been translated by the Drupal community. All you need to do is download a translation file and load it.
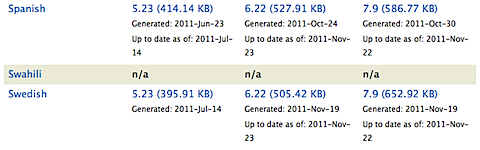
- Visit localize.drupal.org and download an available interface translation for Drupal 7.
- Go to Administration > Configuration > Translate Interface.
- Select the "Import" tab.
- Choose the language file you downloaded (in my case, drupal-7.9.es.po).
- Be sure the "Import into" menu selection corresponds to the imported file.
- Choose whether to replace existing string translations, or just import new ones. Yes, this means that if a translated string isn't appropriate for your site, you can override imported values. Just be careful not to overwrite your changes when updating translations.
- Click Import.
Once complete, you'll be shown an import results showing how many strings were updated and added. You'll also see the percentage of the translation complete for that language. Since it's one of the most spoken languages on the planet, Spanish is a well maintained Drupal interface translation which is typically at 100% complete.
You may now visit your site and append the language code (http://mysite.com/es) to the URL to see the fruits of your labor, so far. Next, let's enable content translation.

2.0 Enable Content Translation
As Karen points out in her article, content translation in Drupal 7 can now be configured at the node or field levels. She notes the debate among Drupal developers about the merits of each method. For this site, since I'm new to developing multilingual sites, I've decided to follow Karen's recommendation and use the newer field translation model.
Since the translation debate was not settled before Drupal 7 shipped, field translation is not part of core. I'll need to install several contributed modules to enable field translation.
- Entity Translation - Enables translation of node fields, with the exception of titles.
- Title - Enables translation of node titles.
- Entity - Title module dependency.
Here is the Drush command used to download and install these.
drush @my-site en entity_translation title entity
After installation, define which content types (Blog posts, Basic Pages, Articles, etc.) can be translated.
- Go to Administration > Structure > Content Types
- Edit an existing content type, i.e. "Basic page"
- Select the "Publishing options" tab
- Choose "Enabled, with entity translation"
- Save the changes
Next, convert the Title field to a regular field using the Title module, and set which fields are translatable.
- Go to Administration > Structure > Content types
- Select "manage fields" for the content type you enabled translation for, i.e. "Basic page"
- Click "replace" for the Title field
- Check "Replace title with a field instance" and save
- Select the "Manage Display" tab
- Change the Title field's Label and Format to <Hidden> and Save
- Select the "Manage Fields" tab
- Edit the Body field
- Select the "Field Settings" tab
- Check "Users may translate this field" and save the field settings
- Repeat steps 8 through 10 for other translatable fields
Now give it a try. You'll now see a Translation tab next to the standard View and Edit node tabs.
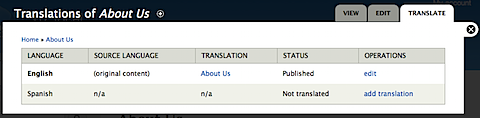
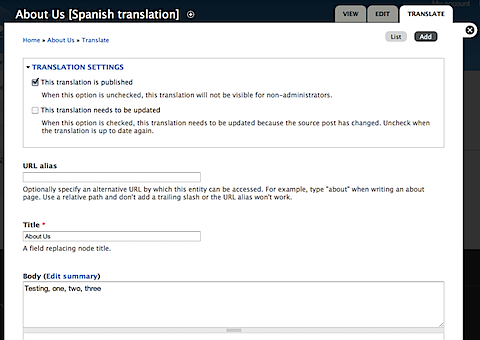
On this tab you'll now see an "add translation" link next to each language you've enabled. Clicking this will display a slightly altered add/edit node form to create a translated version of the original. The translation form will contain the original languages values for reference during translation.
The translation form provides controls to set published state, whether the translation requires an update, and a translated URL alias.
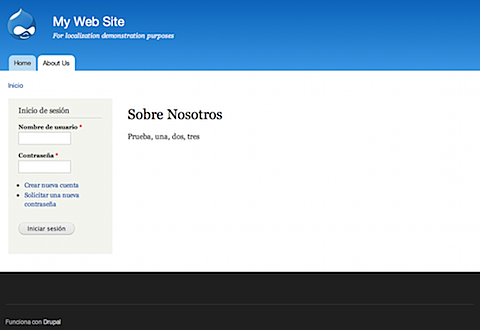
After saving the translation, click on it's title in the translation list to view it. We're almost there. We still need to translate the site's title, slogan, and main menu. We also need to provide a way for visitors to switch languages.
3.0 Switching Between Languages
Next, let's provide a language switcher for users. The Locale module provides a simple block with enabled languages listed. If your site's translated to several languages, this list will take up a lot of real estate. The Language Dropdown module converts the language switcher list to an attractive dropdown menu.
drush @my-site en lang_dropdownNext, enable the language switcher block.
- Visit Administration > Structure > Blocks
- Enable and place Language switcher dropdown (user interface text)
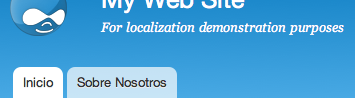
You should now see a fully-functional language switcher menu like this. If you'd like, you can also download and install the Language Icons module which will add flags for each language in the menu.

4.0 Menu Item, Block, Variable, and Contact Form Translation
What about translating menu items and blocks? Let's not forget about the site's name, slogan, and contact form. To tackle these tasks, you'll need the i18n module and the slew of module's it, and it's sub-modules, depend upon.
Install i18n, Translate Menu Items
- Download i18n
drush @my-site dl i18n - Enable i18n_menu, which will also enable several additional required modules.
drush @my-site en i18n_menu The following extensions will be enabled: i18n_menu, i18n_translation, i18n_string, i18n_block, variable, i18n Do you really want to continue? (y/n): y i18n_translation was enabled successfully. [ok] i18n_menu was enabled successfully. [ok] i18n_string was enabled successfully. [ok] i18n_block was enabled successfully. [ok] variable was enabled successfully. [ok] i18n was enabled successfully. [ok] Refreshed 16 strings for the enabled modules. [status] - Go to Administration > Structure > Menus
- Click "edit menu" for the Main menu
- Under "Multilingual options", set the Translation mode to "Translate and Localize"
- Save the menu
- Edit a menu item from the "List Links" tab
- Select the "Translate" tab
- Translate the item and save

Repeat for each menu item.
Note that translation of the Home tab requires that it's default language be changed to English. Once this is done, a translation for the Home tab may be added. You'll see both "Home" and the translated version of Home on menu lists, but only the tab appropriate for a selected language will be displayed to end-users.
Translate Site Variables
The Internationalization module, along with the Variables module, provide support for translating site variable values. These include, but are not limited to, site name, slogan
- Enable the i18n Variable Translation module and it's required modules, Variable store and Variable realm
- Visit Administration > Configuration > Multilingual Settings
- Click on the "Variables" tab
- Select variable to be translated
- Save

This list also includes the RSS feed description, user-related email messages (welcome, password reset, etc.).
Now, to translate the site's name and slogan.
- Go to Administration > Configuration > Site Information
- Select the language to translate variable values to
- Translate variables
- Save
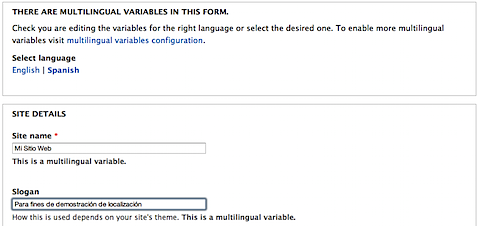
Now you'll see the translated site name and slogan in your banner!

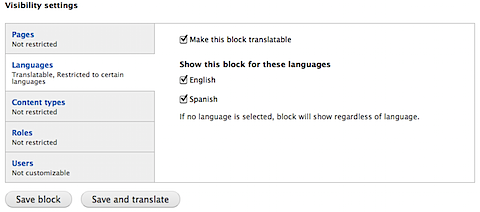
Enable Block Translation
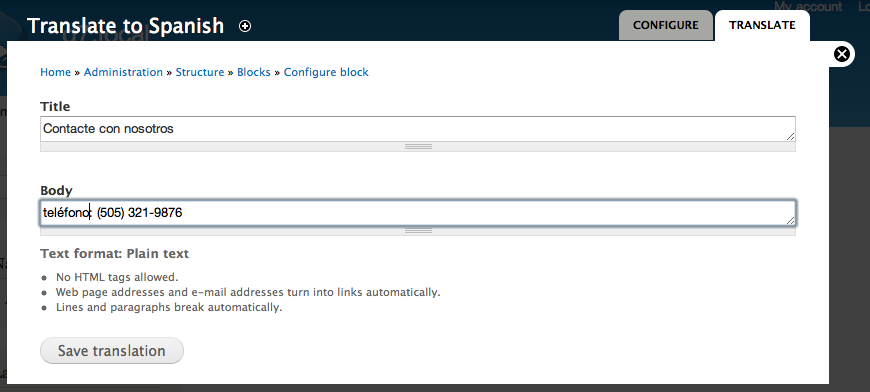
When i18n_menu was enabled above, i18n_block was automatically enabled which, as the name suggests, provides support for block translation. Just create or edit a block and set which languages it can translated to.
You may receive the following error when attempting to translate blocks:
"The string blocks:block:1:body for textgroup blocks is not allowed for translation because of its text format."
No worries, you just need to set which text formats are translatable.
- Visit Administration > Multilingual settings
- Select the "Strings" tab
- Select the Translatable text formats to allow, i.e. Filtered HTML, Full HTML, Plain text
Translate Contact Form Categories and Auto-Reply Messages
This is another relatively straight forward process. Enabling the Contact Translation module allows for the translation of Contact form categories and auto-response messages.
- Enable the Contact and Contact Translation modules
- Go to Administration > Structure > Contact Form
- Edit or Add a category
- Click the "Translate" tab
- Translate the Category and Auto-reply values
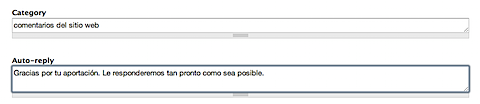
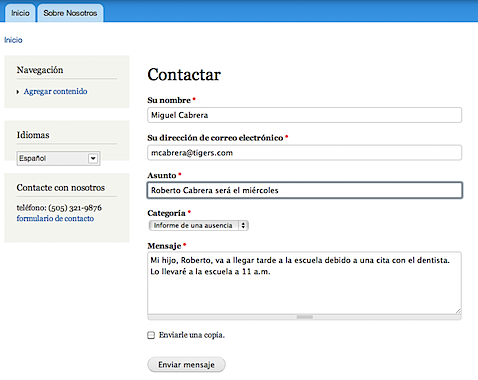
After adding a few categories and translating them, your contact form should look something like this.
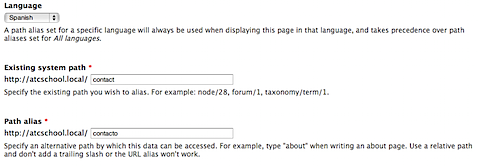
You'll probably want to create a language-specific URL path for special pages, like the contact page (Administration > Configuration > URL aliases).
6.0 Set Date Formats
Don't forget to set locale-appropriate date formats. IBM provides a nice locale quick reference which includes various locales' date formats.
I'll set the following date formats for es-MX at Administration > Configuration > Date and Time.
- Short: 28/11/2011
- Medium: 28 de noviembre de 2011
- Long: lunes 28 de noviembre de 2011
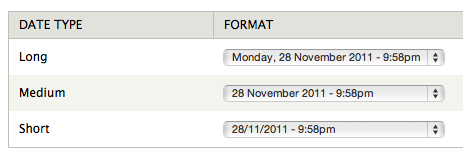
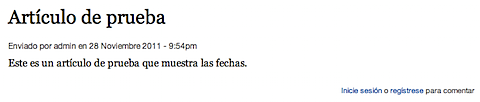
And here's how the date displays for articles and blog posts.
Additional Considerations
There are a few things I haven't touched upon, at least not yet. The Internationalization module makes it relatively easy to tackle these additional translation tasks.
- If you set a node as your site's homepage, you'll need to provide translated nodes for each languages homepage.
- If you've enabled node comments, you'll need to consider how you want to display comments made in various languages. Have a look at the Filter comments per language section of the Comment settings tab.
- Taxonomy
- Views, Internationalization Views
- URLs without accents, Transliteration
- Tracking and managing your site's translation is a lot easier is you can get a bird's eye view.
- i18n update
- l10n_install
The Drupal article on Basic Internationalization Setup provides additional detail and I highly recommend that everyone review it. You may want to also review the i18n module's documentation.