Database Development in Eclipse with the Data Tools Platform (DTP)

I'm getting lazier. I mean lazy like looking for 10 minutes for a lost TV remote rather than getting off the couch to change the channel. Sure, it's not a big deal to switch back and forth between Eclipse and the MySQL Query Browser or phpMyAdmin, but those seconds add up.
In this post I'll show you how to take advantage of another part of the "I" in the Eclipse "IDE".
The Eclipse Data Tools Platform (DTP) is a standard Eclipse plugin that you can use to perform most database development and query functions. The DTP plugin supports several database platforms via JDBC, including Derby, Oracle, MS SQL, Postgres, Sybase ASA, Flat Files, XML Data, Web Services, and more. This post covers connecting to MySQL and basic DTP features.
Requirements
I'll assume that you're comfortable installing Eclipse and Eclipse plugins . I'm also assuming that you've used Eclipse for a bit and have at least one project defined. Here's what you'll need before we get started.
- Eclipse with the DTP plugin, I'm running Eclipse 3.3 which came bundled with DTP version 1.5.0.
- MySQL JDBC Driver, I'm using Connect/J 5.1.
- MySQL Server version 4 or 5 running on localhost or a remote host that allows remote connections.
- MySQL user account with a database or privileges to create databases.
Install a JDBC Driver
Installing Eclipse and DTP does not install JDBC drivers. You must install the appropriate driver for the database server you're using. You can usually get drivers from the vendor. I downloaded the MySQL Connector/J.
- Visit http://dev.mysql.com/downloads/connector/
- Select 'Connector/J' in the left menu, then select a version. I used version 5.1.
- Download the source and binaries and save somewhere that makes sense for your OS. I dropped mine in /Library/Java/Extensions on my Mac.
Create a Driver Template and Connection Profile
Next, create a driver template and a connection profile. You'll be able to reuse this template when creating future connection profiles.
- Select File > New > Other
- Expand Connection Profiles and select Connection Profile, Next >
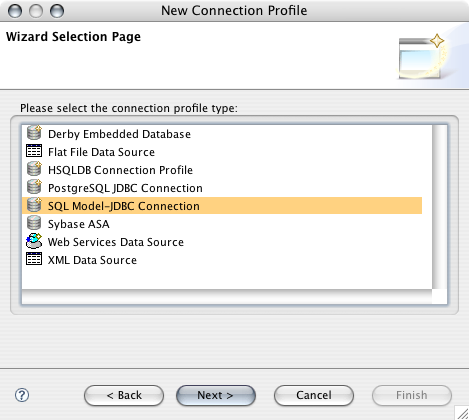
- Select Generic JDBC Connection, Next >
- Name the Connection Profile for the host and database to which you're connecting (i.e. localhost.database), Next >
- Click on the ... button to add your JDBC driver to the Select a driver dropdown menu.
- Select the appropriate folder for your database JDBC driver version, I selected MySQL > 5.1, Click Add...
- Expand the Available Driver Templates folders, select "MySQL JDBC Driver"
- Add the driver version to the Driver Name, I changed mine to "MySQL JDBC Driver 5.1"
Note: Don't be confused by differences in server and driver versions. You can use the 5.1 driver to connect to MySQL 4.x.
- Check "Edit New Driver Definition Immediately", click OK
- Eclipse will display an "Unable to locate jar/zip..." message. Tell Eclipse where the JDBC driver is.
- Select the driver file in the list, click the "Edit Jar/Zip" button
- Browse to and open your JDBC driver. I placed mine at /Library/Java/Extensions/mysql-connector-java-5.1.5/mysql-connector-java-5.1.5-bin.jar
- Set your Connection URL, Database Name, Password, and User ID in the Properties pane, click OK

- Your Driver template now appears in the Available Driver Definitions list, select it, click OK
- Add Optional Properties to those you just set or check the "Save Password" box if you'd like.
- Click the "Test Connection" button, hopefully your Ping succeeded! If not, double check your connection properties.
- Click Finish
Open DTP's Database Development Perspective
With a connection template and profile defined, open up the Database Development Perspective, if it isn't already open.
- Select Window > Open Perspective > Other...
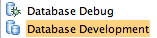
- Select Database Development, click OK
Establish a Database Connection
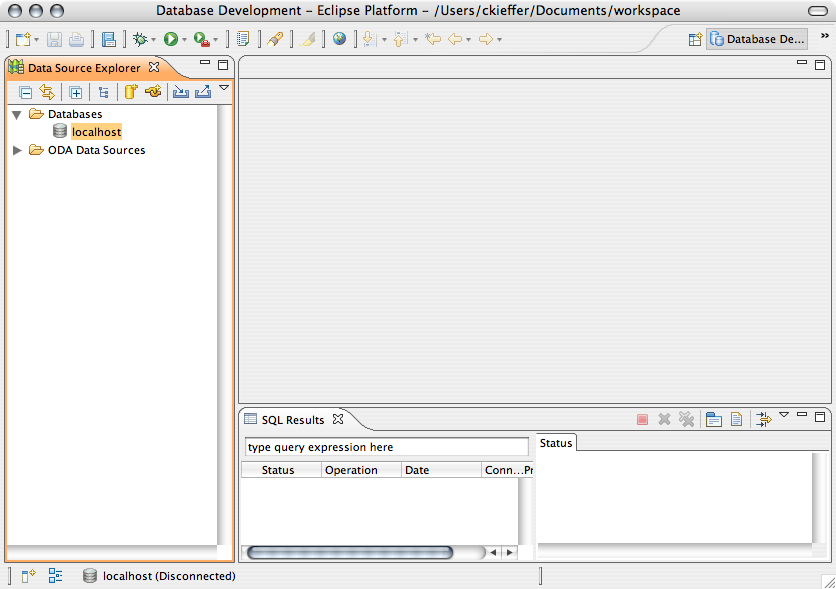
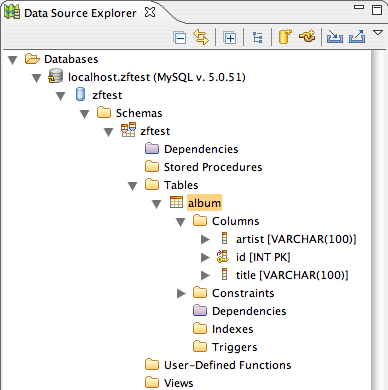
- In the Data Source Explorer pane, expand the Database folder.
- Right-click on the Connection Profile and select Connect
- You should now see folders for table, stored procedures, views, and other objects supported by your database platform.
- If you have tables in your database, expand to view columns.
Create and Execute SQL Files
You can create and modify tables, triggers, stored procedures directly via DTP. Before proceeding, open an existing or create a new Eclipse project. You'll save SQL files to an existing project which makes it easy to place them under version control with the rest of your application files.
- Select File > New > SQL File (or File > New > Other > SQL Development > SQL File).
- Choose the project and folder where you'll save the file.
- Select the Database server type, Connection profile, and Database name. You can skip specifying the database if you're going to create one with the file.
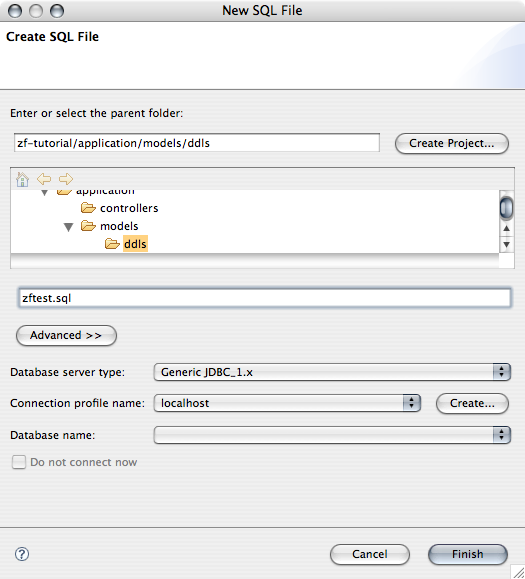
- Click Finish
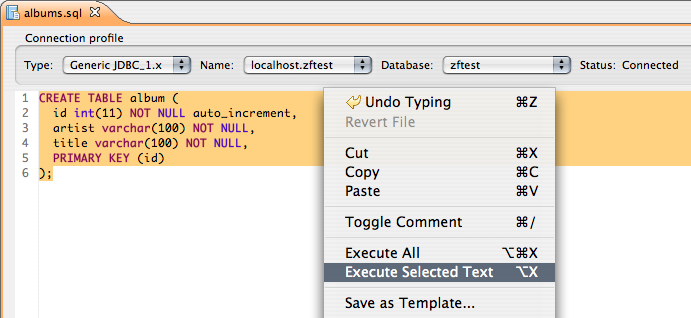
- Type in the SQL you'd like to run.
- Select all, or a portion, of the SQL to run.
- Right-click in the document tab and select either Execute All or Execute Selected Text.
- Review the SQL Results at the bottom of the SQL Development Perspective.
The buttons in the SQL Results tab allow you to track the status for all SQL executed and provide a handy filter for sifting through results.
Insert and Edit Data
- Expand Databases > Host > YourDatabase > Schemas in the Data Source Explorer
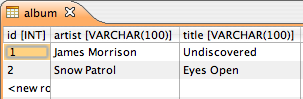
- Right-click on a table and select Data > Edit
- An editor tab appears with the table's columns, enter one or many records into the rows provided
- Right-click anywhere in the editor panel and select save
Easy, isn't it? You probably noticed other nifty features under the Data menu, including Load and Extract. These options allow you to import and export delimitied data from files.
Conclusion
Overall I'm very happy with DTP. It's been a bit of an adjustment getting used to how things are done, but I no longer have to get off the Eclipse "couch" to take care of SQL development tasks. I've covered most of the basics here but I think you'll find several other useful features. Happy data developing!